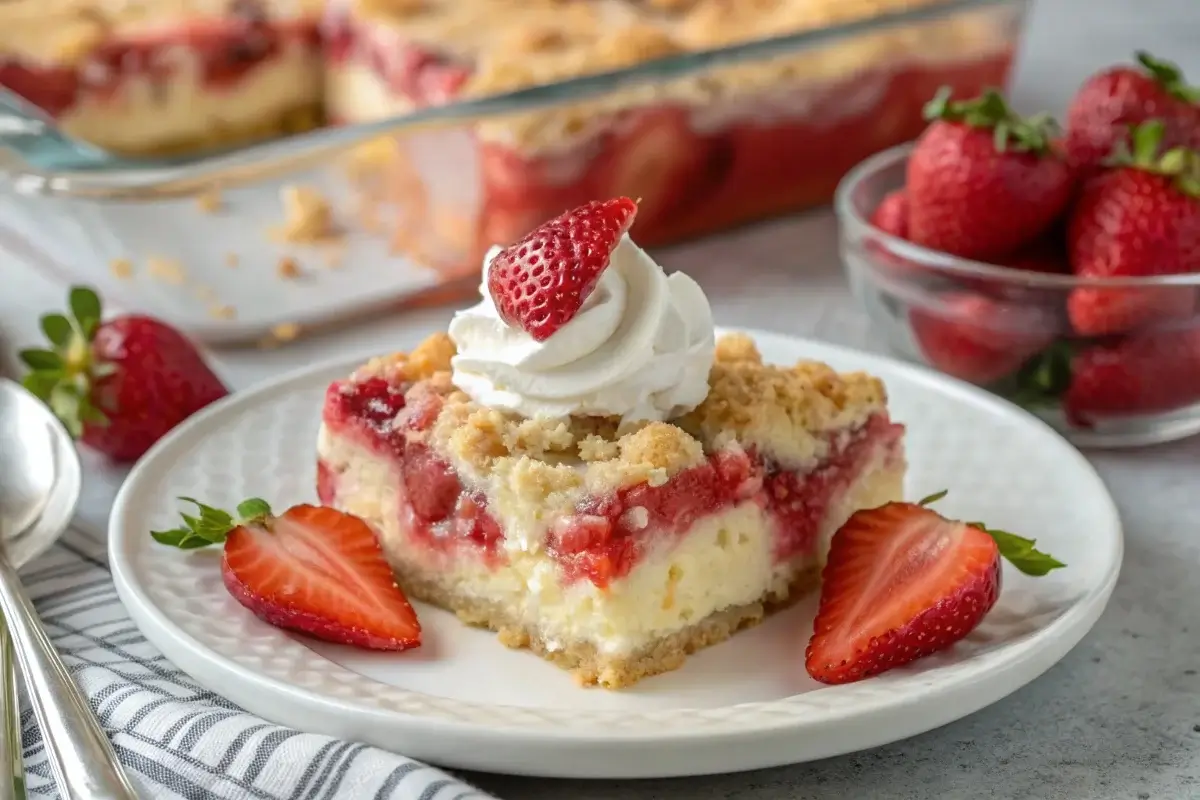
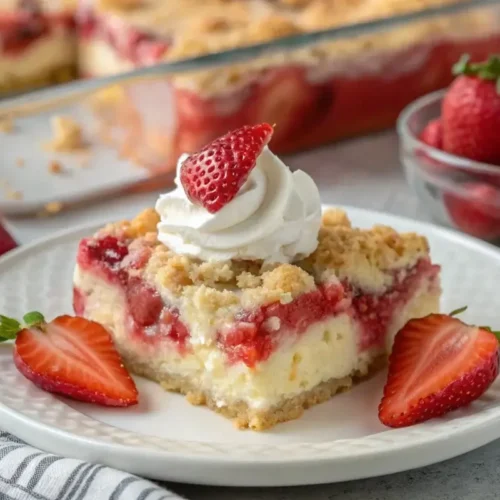
Imagine a dessert that combines the creamy richness of cheesecake with the vibrant, fresh taste of strawberries, all in one simple, easy dessert recipe. A strawberry cheesecake dump cake is a delightful treat that skips the fuss of traditional baking, making it a popular choice among those who love hassle-free baking and innovative cakes. This recipe is not only a budget-friendly cake but also a family-friendly dessert perfect for summer and any festive occasion.
In recent years, dump cakes have become a favorite among dessert enthusiasts. With their straightforward preparation and impressive layered dessert look, these cakes are celebrated for their moist texture and quick dessert ideas. People are increasingly looking for no-fuss cake recipes, and the strawberry cheesecake dump cake fits the bill perfectly. Its blend of fresh strawberries and a creamy cheesecake twist has turned it into a crowd-pleasing recipe that’s as visually appealing as it is delicious.
Enjoy reading along as we explore more about this delectable dessert in the upcoming parts, ensuring you have everything you need to create a mouthwatering strawberry cheesecake dump cake that will wow your guests.
Key Ingredients for Strawberry Cheesecake Dump Cake
Essential Ingredients and Their Roles in the Recipe
To make a perfect strawberry cheesecake dump cake, you need quality ingredients that work well together. First, you have the fresh strawberries, which add a burst of tangy sweetness. Next, you incorporate the creamy cheesecake layer, offering a rich and smooth texture. Also, the cake mix serves as the base, providing structure and a delightful crunch when baked. Moreover, a few essential ingredients, such as sugar and eggs, help bind the flavors together. As you can see, each component plays a vital role in creating a dessert that is not only visually appealing but also incredibly delicious.
Smart Substitutions and Dietary-Friendly Alternatives
Now, if you prefer healthier options or have dietary restrictions, worry not. Instead of traditional sugar, you can use a natural sweetener like honey or agave syrup, which is a great alternative. Furthermore, if you are looking for a dairy-free version, consider substituting regular cheesecake with a plant-based alternative. Additionally, for those who need a gluten-free option, try using a gluten-free cake mix. By choosing these smart swaps, you ensure that your strawberry cheesecake dump cake remains a crowd-pleasing recipe that everyone can enjoy. Also, these substitutions offer flexibility while still preserving the dessert’s original charm and flavor.
Step-by-Step Guide to Making Strawberry Cheesecake Dump Cake
Preparation and Assembly Process for a Perfect Cake
First, preheat your oven to the required temperature. Then, gather all your ingredients, including fresh strawberries, a creamy cheesecake mix, and the cake mix base. Next, prepare your baking dish by greasing it lightly. After that, spread the cheesecake mixture evenly over the bottom layer. Subsequently, add the strawberry topping, making sure each slice is evenly distributed. As you follow these steps, remember to mix the ingredients gradually so that every component is well incorporated. In short, this organized approach ensures your strawberry cheesecake dump cake turns out perfectly every time.
Baking Tips: Achieving the Ideal Texture and Flavor
Before you pop the cake into the oven, check that the layers are well-arranged. Once the cake is in the oven, monitor its progress; this helps you prevent over-baking. Meanwhile, using a toothpick to test the center is a great way to know when it’s done. Additionally, let the cake cool for a few minutes before serving to enhance its flavor and texture. Finally, if you feel creative, add a sprinkle of extra fresh strawberries or a dusting of powdered sugar on top just before serving. Overall, these baking tips guarantee that your strawberry cheesecake dump cake is moist, flavorful, and simply irresistible.
Creative Variations and Twists
Enhancing Flavor with Fresh Strawberries and Toppings
To add extra zest to your strawberry cheesecake dump cake, try mixing in even more fresh strawberries. For example, consider adding sliced strawberries in between layers to create a burst of flavor in every bite. Additionally, you can sprinkle a handful of granola or nuts on top to add a delightful crunch. Moreover, a dollop of whipped cream or a drizzle of honey can elevate the overall taste. In short, these creative twists allow you to personalize the dessert while maintaining its charm and ease of preparation.
Innovative Presentation Ideas to Impress Your Guests
Furthermore, when serving your strawberry cheesecake dump cake, presentation matters. First, consider using a clear glass dish to show off the vibrant layers. Then, garnish the cake with a few whole strawberries and a light dusting of powdered sugar. Also, serving the cake in individual portions can make it more appealing at parties. As a result, these innovative ideas not only boost the cake’s visual appeal but also enhance its flavor experience.
Serving Suggestions and Storage Tips
Serving Ideas for Special Occasions and Family Gatherings
To serve your strawberry cheesecake dump cake, start by cutting it into generous squares. Then, plate each piece with a scoop of your favorite ice cream. Additionally, adding a drizzle of fruit sauce or a sprinkle of fresh mint can bring a refreshing twist. Furthermore, these serving ideas work wonderfully for family gatherings, birthday parties, or even a casual dessert night. As a result, your dessert is sure to be the highlight of any occasion.
Best Practices for Storage and Reheating
After enjoying your delicious cake, proper storage is key. Firstly, allow the cake to cool completely before covering it. Then, store it in an airtight container in the fridge to maintain its moist texture. Moreover, if you plan to reheat the cake, do so at a low temperature in the oven to preserve its delicate flavor. In summary, following these storage tips ensures that your strawberry cheesecake dump cake stays fresh and delightful for later enjoyment.
FAQs and Conclusion on Strawberry Cheesecake Dump Cake
Common Questions and Expert Answers
Many people wonder if making a strawberry cheesecake dump cake is as simple as it sounds. For instance, one common query is whether you can use frozen strawberries instead of fresh ones. In response, yes, you can, but keep in mind that fresh strawberries add more flavor. Moreover, another frequent question relates to the cheesecake layer; experts advise that using a dairy-free alternative can still yield a rich and creamy texture. Additionally, visitors ask if the cake can be made ahead of time. Therefore, it is best to bake it a day in advance and store it properly. Overall, these expert tips help ensure your cake turns out beautifully every time.
Final Thoughts and Tips for Enjoying Your Cake
In conclusion, the strawberry cheesecake dump cake is a delightful dessert that suits any occasion. Furthermore, its simple preparation and customizable nature make it a favorite among dessert lovers. Also, remember to experiment with toppings and add creative twists to suit your taste. Finally, by following these expert tips, you can easily impress your guests with this easy, delicious dessert. Enjoy every bite, and happy baking!
Nutritional Information (Per 100g)
| Nutrient | Amount per 100g |
|---|---|
| Calories | 250 kcal |
| Protein | 4 g |
| Carbohydrates | 35 g |
| Sugars | 20 g |
| Fats | 10 g |
| Saturated Fats | 4 g |
| Fiber | 1.5 g |
| Sodium | 150 mg |
Strawberry Cheesecake Dump Cake Recipe
Ingredients
- 1 (15.25 oz) box of yellow cake mix
- 1 (8 oz) container of cream cheese, softened (or dairy-free alternative)
- 1/2 cup unsalted butter, melted
- 1/2 cup granulated sugar
- 1/2 cup sour cream (or plant-based sour cream)
- 2 large eggs, lightly beaten
- 1 teaspoon vanilla extract
- 3 cups fresh strawberries, hulled and sliced
- 1/4 cup strawberry preserves (optional, for extra flavor)
Instructions
- Preheat and Prepare: Begin by warming your oven to 350°F (175°C) and lightly greasing your baking dish. Lightly coat a 9×13-inch baking dish with a thin layer of oil to keep your cake from sticking.
- Mix Cream Cheese Layer: In a bowl, beat the softened cream cheese until smooth. Next, add the melted butter, granulated sugar, sour cream, eggs, and vanilla extract. Mix well until the mixture is creamy and free of lumps.
- Assemble the Base: Evenly spread the cream cheese mixture over the bottom of the prepared baking dish.
- Add Strawberries: Arrange the sliced strawberries on top of the cream cheese layer. If you prefer a sweeter touch, drizzle the strawberry preserves over the fruit.
- Dump Cake Topping: Sprinkle the entire box of cake mix evenly over the strawberry layer. There is no need to mix; the cake mix will create a crumbly, cakey topping as it bakes.
- Bake: Place the dish in the oven and bake for 40 minutes, or until the topping turns golden brown and the filling is bubbly.
- Cool and Serve: Allow the cake to cool for at least 15 minutes before cutting into squares. This step helps the layers set for clean slices.
Notes
- For an extra burst of flavor, feel free to add a sprinkle of lemon zest to the cream cheese mixture.
- If you prefer a less sweet dessert, reduce the granulated sugar by 2 tablespoons.
- This recipe works equally well with frozen strawberries; however, ensure they are thawed and drained well to avoid excess moisture.
- Experiment with toppings like a dollop of whipped cream or a light dusting of powdered sugar for added presentation flair.
- Store any leftovers in an airtight container in the refrigerator for up to three days, and enjoy it cold or reheated in the oven at a low temperature.